

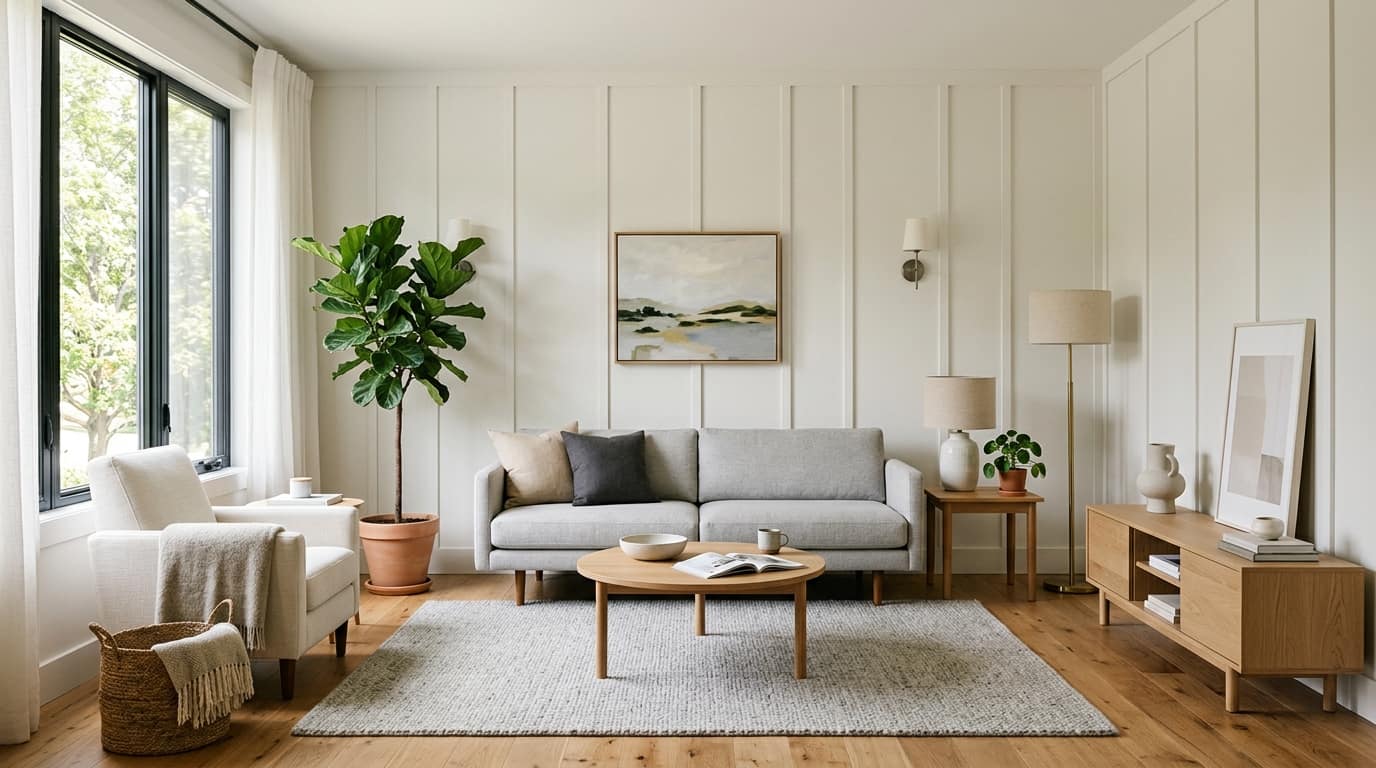
Painting wood paneling costs $1.00 to $3.50 per square foot in Sacramento, with most homeowners paying $600 to $1,800 to repaint a standard paneled room professionally (HomeGuide, 2026; Fixr, 2026). DIY material costs run $120 to $350 for a single room, depending on whether you fill the grooves and which primer the paneling demands.
Sacramento homes packed with original wood paneling sit mostly in 1960s and 1970s neighborhoods like Arden-Arcade, Carmichael, Citrus Heights, and the Pocket. We see paneled dens, stairwells, basements, and entire family rooms come through our shop every winter when homeowners decide that the orange-toned 1970s look has finally run its course. The good news: paint transforms a paneled room more dramatically than any other interior finish change. The catch: cheap paint over unprepped paneling looks worse than the original wood within a year.
This guide walks through the realistic Sacramento cost range, the prep steps that actually matter, the primer decision that will make or break your finish, and what to expect from a professional crew. For broader interior pricing context, our interior painting cost guide covers Sacramento rates room by room.
Cost to Paint Wood Paneling in Sacramento
Most Sacramento paneled rooms fall into one of four scope tiers. The table below shows professional pricing at typical Sacramento contractor rates for 2026.
| Room Type | Wall Area | DIY Cost | Professional Cost |
|---|---|---|---|
| Small accent wall | 60–100 sq ft | $80–$180 | $200–$450 |
| Standard bedroom | 300–400 sq ft | $150–$300 | $600–$1,100 |
| Family room or den | 450–650 sq ft | $250–$450 | $1,000–$1,800 |
| Whole basement / multi-room | 1,000+ sq ft | $500–$900 | $2,000–$4,500 |
The professional column includes labor, materials, degreasing, sanding, stain-blocking primer, and two finish coats. The DIY column assumes you already own brushes, rollers, drop cloths, and basic painting tools.
Sacramento contractor rates for interior repaints typically run $50 to $90 per hour, and a paneled room takes 25 to 40 percent longer than a standard drywall repaint of the same square footage because of the prep load and the cut-in time around grooves (Fixr, 2026). Add another 30 to 60 percent if you want the grooves filled for a smooth-wall look (more on that decision below).
What Drives the Price
Six factors push paneling jobs toward the high end of the range:
- Knot density and resin content. Knotty pine and cedar paneling carry far more resin than birch or oak veneer. Resin bleed-through requires a shellac or oil-based stain blocker, and sometimes two coats of primer.
- Existing finish. Glossy varnished or polyurethaned paneling needs aggressive degreasing and full sanding. Flat, unfinished, or already-painted paneling cuts prep time roughly in half.
- Smoke and grease exposure. Paneling in old kitchens, dens, or homes with smokers absorbs decades of contaminants that block paint adhesion. TSP cleaning becomes mandatory.
- Groove fill option. Filling vertical grooves with caulk or spackle for a smooth-wall look adds 8 to 16 hours of labor per room.
- Trim and built-ins. Paneled rooms often include matching trim, door casings, and built-in shelves that need the same treatment.
- Lead paint risk. Homes built before 1978 require lead testing on any previously painted surface. See our lead paint testing guide for Sacramento compliance details.
Citation capsule: Painting wood paneling costs $1.00 to $3.50 per square foot in Sacramento, with national averages running $1.20 to $3.10 per square foot according to HomeGuide 2026 and Fixr 2026 data. Knotty pine and cedar paneling sit at the top of the range because resin bleed-through demands a shellac-based stain-blocking primer rather than a standard latex primer.
What You'll Need: Materials and Tools
Stock everything before you start. Running to the hardware store mid-prep almost guarantees you'll skip a step.
Materials
- Shellac-based or oil-based stain-blocking primer (Zinsser BIN, Zinsser Cover Stain, or Kilz Original) -- $25 to $50 per gallon
- 100% acrylic latex interior paint in eggshell or satin sheen -- $35 to $75 per gallon
- TSP (trisodium phosphate) or TSP substitute -- $8 to $15
- Lightweight spackle or paintable caulk (only if filling grooves) -- $8 to $20
- 120-grit and 220-grit sandpaper -- $10 to $20
- Painter's tape (2 inch) -- $8 to $15
- Drop cloths -- $15 to $30
- Tack cloth -- $5
Tools
- 2.5 inch angled sash brush
- 4 inch mini foam roller and 9 inch microfiber roller (3/8 inch nap)
- Sanding block and orbital sander (optional but speeds the job)
- Putty knife (only if filling grooves)
- Bucket, sponges, and rubber gloves for the TSP wash
- Stir sticks and paint trays
- Respirator rated for organic vapors (essential when using shellac primer)
How to Paint Wood Paneling: The Step-by-Step Process
Here is the exact process Sacramento painting contractors use to deliver a finish that holds up for 10 to 15 years on real wood paneling.
-
Inspect and identify the paneling type. Real solid wood paneling, plywood paneling with a wood veneer, and printed MDF paneling all behave differently under paint. Solid wood and veneer need stain-blocking primer for knot bleed. Printed MDF (the cheap stuff with a photo of wood grain) only needs a basic bonding primer because there are no real knots underneath. Look at an exposed edge or behind an outlet plate to confirm what you have.
-
Mask and protect the room. Lay drop cloths across the entire floor. Tape baseboards, ceiling lines, window casings, and any built-in trim you don't plan to paint. Remove outlet covers, switch plates, and any wall-mounted hardware. Painted paneling tends to drip and smear more than drywall because of the vertical grooves channeling paint downward.
-
Degrease the entire surface with TSP. This is the step DIYers skip and regret. Mix TSP per the label, apply with a sponge or sponge mop, scrub the panels and grooves with a stiff bristle brush, then rinse with clean water and a fresh sponge. Sacramento dens and family rooms from the 1970s often hold decades of cooking grease, cigarette smoke, lemon-oil polish, and household dust embedded in the wood pores. Without removing it, primer will not bond. For heavily contaminated paneling, do two passes.
-
Let the paneling dry for 24 hours. Painting damp wood is the second most common cause of finish failure. Sacramento's dry inland climate works in your favor here -- 24 hours is usually enough, but bump it to 48 hours in winter when humidity climbs.
-
Sand the surface with 120-grit, then 220-grit. The goal is not to strip the finish but to scuff it so primer can grab. Glossy varnished paneling needs aggressive 120-grit knockdown first. Already-flat or unfinished paneling can go straight to 220-grit. Sand the grooves by hand with folded sandpaper. Use an orbital sander on the flat panel faces if you have one -- it cuts the time in half. Wipe everything down with a tack cloth before priming. Skipping the sanding step is the easiest way to watch your paint peel within six months.
-
Optional: fill the grooves for a smooth-wall look. This is the single biggest decision on a paneling repaint. If you want the finished room to look like drywall instead of paneling, fill every groove with paintable caulk (for slight grooves) or lightweight spackle (for deeper V-grooves). Push the filler into the groove with a putty knife, smooth flush with the panel surface, and let it dry per the product label. Sand smooth, then dust off. Plan for 8 to 16 extra hours per room and a result that looks remarkably close to flat drywall once primed.
-
Apply stain-blocking primer. This is where the primer choice matters more than any other product decision on the project. Brush the grooves first with an angled sash brush, working primer fully into the V-cut. Then roll the panel faces with a microfiber roller. Let dry per the product label -- typically 45 minutes for shellac primer or 4 to 6 hours for oil-based.
-
Spot-prime any remaining knot bleed. After the first coat dries, walk the room and look for amber or yellow spots showing through the white primer. Each spot is a knot pushing resin to the surface. Hit those spots with a second coat of shellac primer and let dry before topcoating.
-
Apply two coats of finish paint. Cut in the grooves first with the angled sash brush, then roll the panel faces with a 3/8 inch nap microfiber roller. Two thin coats deliver a more uniform finish than one heavy coat. Allow 4 to 6 hours of dry time between coats. Eggshell sheen is the most popular choice for paneled walls because it scrubs clean without highlighting brush marks the way satin and semi-gloss can.
-
Reinstall hardware and remove masking. Pull painter's tape while the final coat is still slightly tacky -- waiting until fully dry can lift dried paint from the wall surface. Reinstall outlet covers, switch plates, and any trim hardware.
For broader interior prep guidance that applies to every room type, our interior painting preparation guide covers room protection, surface preparation, and timing across all surfaces.
Why Knot Bleed-Through Ruins Wood Paneling Paint Jobs
Knots are the number-one reason DIY paneling jobs fail. Real wood paneling -- especially knotty pine, cedar, and rough-sawn fir -- contains pockets of resin and tannins inside every visible knot. When latex paint goes over an unsealed knot, those resins migrate up through the paint film over weeks and months, leaving amber, brown, or yellow halos that bleed through even three coats of finish paint.
Standard latex primer does not stop knot bleed. Bonding primers do not stop knot bleed. The only two product categories that reliably block knot resins are shellac-based primers and oil-based stain blockers.
Shellac vs Oil-Based Primer for Wood Paneling
Both shellac and oil-based primers seal knots and block stain bleed-through. Sacramento contractors split roughly 70/30 in favor of shellac for paneling jobs because of the dry time and odor differences.
| Factor | Shellac Primer (Zinsser BIN) | Oil-Based Primer (Kilz Original / Cover Stain) |
|---|---|---|
| Knot blocking | Excellent | Excellent |
| Dry time | 45 minutes | 4–8 hours |
| Recoat window | 1 hour | 6–24 hours |
| Odor level | Strong (alcohol) | Strong (mineral spirits) |
| Cleanup | Denatured alcohol | Mineral spirits |
| Cost per gallon | $45–$55 | $25–$40 |
| Best for | Faster turnaround, severe knot bleed | Budget jobs, less pungent indoor application |
| VOC level | Higher | Higher |
Both products require ventilation and a respirator with organic vapor cartridges. Neither belongs in an indoor space without open windows and a fan moving air through the room. If indoor air quality is a primary concern -- nurseries, asthma sufferers, indoor pets -- consider hiring a professional crew with proper ventilation equipment. Our eco-friendly painting guide covers low-VOC alternatives, though the trade-off is that water-based primers do not reliably stop knot bleed on real wood paneling.
Sanding Wood Paneling: Grit and Technique
Sanding gets oversold and undersold in equal measure on paneling forums. The truth sits in the middle: you do not need to strip the existing finish, but you absolutely need to scuff it.
Grit Selection
- 120-grit: Use for the first pass on glossy varnished or polyurethaned paneling. Knocks down the shine and opens the surface for primer adhesion. One pass is enough -- you are scuffing, not stripping.
- 220-grit: Use for the second pass on glossy paneling, or as the only pass on flat/matte/already-painted paneling. Smooths the surface and removes any 120-grit scratches.
- 320-grit (optional): Use between primer coats and between finish coats if you want a furniture-grade smooth finish. Most paneling jobs skip this.
Technique
Sand with the grain on solid wood paneling. On veneered or printed paneling, the direction matters less because there is no real grain underneath, but sanding in long uniform strokes still produces a more even scuff pattern. Use an orbital sander on the flat panel faces and fold a piece of sandpaper into the grooves to do them by hand. The grooves are tedious but unavoidable -- skipping them leaves smooth strips of unprimed varnish that will show through the finish.
After sanding, wipe the entire surface with a tack cloth to remove dust. Sacramento's low humidity means dust hangs in the air and resettles on horizontal surfaces, so vacuum the floor before priming.
Should You Fill the Grooves?
The groove fill question divides paneling repaints into two camps. Both produce a finished look that beats the original wood, but they are visually very different.
Leaving the Grooves Visible
- Faster, cheaper, lower risk
- Preserves the panel character (now in a clean modern color rather than 1970s orange)
- Reads as "shiplap" once painted white -- this aesthetic is currently popular in Sacramento and Bay Area design
- Easier to repair down the road
- Matches well with farmhouse, transitional, and coastal interior styles
Filling the Grooves
- 8 to 16 extra hours of labor per room
- $30 to $80 in additional materials (caulk, spackle, extra primer)
- Visually indistinguishable from drywall once finished
- Better fit for modern, minimalist, and contemporary interior styles
- More vulnerable to cracking along the seams over time as the wood expands and contracts
For Sacramento homes targeting a traditional or shiplap-inspired look, leave the grooves visible and let the white paint do the work. For contemporary remodels where the goal is a smooth, monolithic wall surface, fill the grooves and accept the extra labor. There is no wrong answer -- the choice is purely aesthetic.
For color guidance once you've made the structural decision, our best interior paint colors guide covers what's working in Sacramento homes this year, and our color drenching guide shows how to use a single color across walls, trim, and ceiling for a high-impact transformation.
Sacramento & Placer County
Need a real quote on your project?
Free, no-obligation walkthrough. Itemized estimate within 24 hours. Most jobs scheduled within 2–3 weeks.
DIY vs Professional Wood Paneling Painting
The cost gap between DIY and professional paneling painting is wider than most homeowners expect because of the prep load. Here is how the numbers work for a standard 400 square foot bedroom or den.
| Cost Category | DIY | Professional |
|---|---|---|
| Stain-blocking primer (1 gal) | $25–$50 | Included |
| Latex finish paint (1–2 gal) | $35–$150 | Included |
| TSP cleaner | $8–$15 | Included |
| Sandpaper (120 + 220 grit) | $10–$20 | Included |
| Brushes, rollers, trays | $30–$60 | Included |
| Drop cloths, tape, misc | $20–$40 | Included |
| Caulk / spackle (if filling grooves) | $10–$30 | Optional add-on |
| Total materials | $140–$365 | Included in quote |
| Labor | DIY (16–28 hours) | $500–$1,400 |
| Total project cost | $140–$365 | $650–$1,750 |
DIY saves $500 to $1,400 on a typical room, but the time investment is significant -- expect a full weekend plus several evenings for prep, primer, and two finish coats with proper dry time. The ROI tilts toward DIY for homeowners who already own basic tools and have the patience for the cleaning and sanding steps.
The case for professional work tilts on three factors:
- Multiple rooms or whole basements. The labor savings scale, but so does the risk of inconsistent results. Pros maintain the same prep standard across every room.
- Heavy knot bleed or smoke contamination. Both situations require multiple primer coats and judgment calls on when to stop. Pros recognize the warning signs faster.
- Lead paint risk. Homes built before 1978 require RRP-certified handling for any sanding or scraping. Sacramento's 1960s and 1970s neighborhoods (where most paneling lives) frequently fall into this category.
Our DIY vs professional painting comparison covers the broader decision framework for interior painting projects.
Best Paint Finish for Painted Wood Paneling
Eggshell and satin sheens dominate Sacramento paneling repaints for good reason. Both finishes are scrubbable enough for high-traffic family rooms while soft enough to hide the brush marks that grooved surfaces inevitably collect.
- Flat / matte: Avoid on paneling. Looks great on dry-wall but shows every fingerprint on grooved surfaces and is impossible to clean.
- Eggshell: The most popular choice for paneled walls. Scrubbable, soft sheen, hides minor brush marks, works for nearly every room except baths.
- Satin: Slightly shinier than eggshell. Better for kitchens, baths, and high-traffic family rooms with kids and pets. Highlights surface imperfections more than eggshell.
- Semi-gloss: Reserve for trim, doors, and built-in shelving. Too shiny for full paneled walls -- amplifies every brush mark and groove inconsistency.
- Gloss: Almost never appropriate for paneling. Reserve for furniture-grade trim work.
For a deeper look at sheen selection by room type, our paint sheen guide covers the full decision tree.
How Long Does Painted Wood Paneling Last?
Properly prepped and primed wood paneling holds its finish for 10 to 15 years before needing a full repaint. That puts paneling at roughly the same lifespan as standard interior drywall paint in a typical Sacramento home.
The variables that shorten that lifespan:
- High-traffic family rooms with kids and pets (closer to 8 to 10 years)
- South-facing rooms with strong direct sunlight (UV breaks down latex paint over time)
- Kitchens with grease and humidity exposure (closer to 6 to 8 years)
- Rooms with continued woodstove or fireplace use (smoke deposits dull the finish)
Touch-up cycles every 3 to 5 years on high-traffic walls extend the full repaint interval significantly. For a broader look at interior paint lifespan and repaint timing, our how often to repaint your house guide covers Sacramento maintenance schedules across every interior surface.
How to Save Money on Paneling Painting
Skip the Groove Fill
The single biggest cost decision is whether to fill the grooves. Leaving them visible cuts 8 to 16 hours of labor and $30 to $80 in materials per room, and the painted-paneling-with-grooves look is currently in style across Sacramento and Bay Area design.
Bundle With Other Interior Work
Most contractors offer 10 to 20 percent discounts when paneling work is bundled into a larger interior repaint. A paneled den painted alongside a hallway or living room costs less per room than the same work scheduled separately because the crew mobilization spreads across more square footage.
Schedule for the Off-Season
Sacramento interior painting work runs cheaper from November through February as crews fill slower exterior schedules with indoor work. Expect 10 to 15 percent off peak season rates for paneling jobs scheduled in winter.
Provide the Paint Yourself
Some contractors mark up materials 15 to 25 percent. Buying the primer and finish paint directly from a Sherwin-Williams or Benjamin Moore store and providing it on the day of the job saves $40 to $120 on a typical paneling project. Confirm with the contractor in advance so you buy products they will warranty.
Tackle Cleaning Yourself
Prep is 70 percent of the labor on a paneling job. If you handle the TSP wash the day before the contractor arrives -- and let the panels dry overnight -- you can negotiate $100 to $250 off the labor portion. Sacramento crews routinely accept this trade.
Frequently Asked Questions
How much does it cost to paint wood paneling?
Painting wood paneling costs $1.00 to $3.50 per square foot in Sacramento, with most homeowners paying $600 to $1,800 to repaint a standard paneled room professionally (HomeGuide, 2026; Fixr, 2026). DIY material costs run $140 to $365 per room. Cost varies based on knot density, existing finish condition, smoke or grease contamination, and whether you choose to fill the grooves for a smooth-wall look.
What is the best primer for wood paneling?
A shellac-based primer like Zinsser BIN is the best choice for real wood paneling because it dries fast (45 minutes), blocks knot bleed-through reliably, and bonds to glossy varnished surfaces without aggressive sanding. Oil-based stain blockers like Zinsser Cover Stain or Kilz Original are a budget alternative that work equally well at blocking knots but require 4 to 8 hours of dry time between coats. Standard water-based primers and bonding primers do not reliably stop knot bleed on real wood paneling and should be avoided.
Do you need to sand wood paneling before painting?
Yes -- sanding is non-negotiable on glossy varnished or polyurethaned paneling. Use 120-grit for the first pass to knock down the shine, then 220-grit to smooth the surface and prep for primer. Already-flat or matte paneling can skip the 120-grit and go directly to 220-grit. The goal is to scuff the surface, not strip the finish. Sand the grooves by hand with folded sandpaper. Skipping the sanding step is the single most common cause of paneling paint jobs that peel within 6 to 12 months.
Why are the knots bleeding through my paneling paint?
Knots in real wood paneling contain pockets of resin and tannins that migrate up through latex paint over weeks and months, leaving amber, yellow, or brown stains that show through finish coats. The fix is a shellac-based primer (Zinsser BIN) or oil-based stain blocker (Kilz Original or Cover Stain) applied as the first coat, followed by spot-priming any visible knots before topcoating. Standard latex primer and water-based bonding primers will not stop knot bleed -- only shellac and oil products reliably seal the resins.
Should you fill the grooves in wood paneling before painting?
Filling grooves is a stylistic choice, not a structural requirement. Leaving grooves visible produces a shiplap-style look that fits farmhouse, traditional, transitional, and coastal interiors. Filling grooves with paintable caulk or lightweight spackle produces a smooth-wall finish that fits modern, contemporary, and minimalist interiors. Filling adds 8 to 16 hours of labor per room and $30 to $80 in materials. There is no wrong answer -- the decision depends entirely on the look you want.
What sheen of paint should you use on wood paneling?
Eggshell is the most popular sheen for painted wood paneling because it scrubs clean without amplifying brush marks the way satin and semi-gloss can. Satin is a good alternative for kitchens, baths, and high-traffic family rooms where extra durability matters. Avoid flat or matte sheen on paneling -- it shows every fingerprint and is nearly impossible to clean. Reserve semi-gloss and gloss for trim, doors, and built-in shelving rather than the panel walls themselves.
Can you paint over already-painted wood paneling?
Yes, and this is one of the easier paneling repaints because the surface is already sealed and primed. Lightly sand with 220-grit to scuff the existing paint, wipe down with TSP to remove dust and oils, and apply two coats of new finish paint. You can usually skip the stain-blocking primer on previously painted paneling unless you spot any knot bleed pushing through the existing finish.
How long does it take to paint a wood paneled room?
A professional crew typically completes a standard 400 square foot paneled bedroom in 6 to 9 hours of work spread across two days, including drying time between primer and finish coats. DIY work runs 16 to 28 hours of total labor for the same room, usually spread across a long weekend with overnight drying breaks. Filling the grooves for a smooth-wall look adds another 8 to 16 hours regardless of who does the work.
Get a Wood Paneling Painting Estimate in Sacramento
Painting wood paneling is one of the highest-impact, longest-lasting interior makeovers available in older Sacramento homes. A standard paneled room costs $600 to $1,800 professionally or $140 to $365 in DIY materials, and the result transforms a dated 1970s den or family room into a clean, modern space that feels years younger.
Three things to remember. First, prep is 70 percent of the work -- specifically degreasing with TSP and sanding to 220-grit -- and the quality of those steps determines whether the finish lasts 10 years or 10 months. Second, primer choice is non-negotiable on real wood paneling: use a shellac-based primer like Zinsser BIN or an oil-based stain blocker like Kilz Original to seal knot resins, because water-based primers will fail. Third, the groove-fill decision is purely aesthetic -- leave them for a shiplap look, fill them for a smooth-wall modern look.
ProFlow Painting provides free wood paneling repaint estimates across the Sacramento metro area, from 1960s ranches in Arden-Arcade and Carmichael to mid-century homes in the Pocket and Land Park. We inspect the paneling type, identify whether knot bleed and smoke contamination will require extra primer coats, and deliver a transparent itemized quote. Every project includes degreasing, sanding, stain-blocking primer, and two finish coats with the sheen of your choice.
Ready to refresh your paneled room? Request your free estimate online or call (916) 740-7249 to schedule a walkthrough.
Free quote · Sacramento & Placer County
Ready for a real estimate, not a guess?
Tell us about your project and we'll walk it with you in person. Itemized quote within 24 hours, no high-pressure sales.