
Proper preparation is the foundation of a long-lasting exterior paint job. In Sacramento's unique climate, thorough prep work can mean the difference between a finish that lasts 5 years and one that lasts 10+ years.
Why Preparation Matters
Exterior paint preparation typically accounts for 60-70% of the total project time, but it's crucial because:
- Paint adheres better to properly prepared surfaces
- Prevents premature peeling and failure
- Identifies hidden damage before it becomes expensive
- Extends paint life by 3-5 years
- Provides better coverage and finish quality
Surface Preparation Steps
1. Inspection and Assessment
Before any work begins, thoroughly inspect your home's exterior:
Check for damage:
- Cracked or missing caulk around windows and doors
- Rotted wood on siding, trim, or fascia boards
- Loose or missing siding pieces
- Water damage or staining
- Mold, mildew, or algae growth
- Previous paint failure (peeling, bubbling, cracking)
Document findings:
- Take photos of problem areas
- Make a detailed list of repairs needed
- Prioritize structural repairs over cosmetic ones
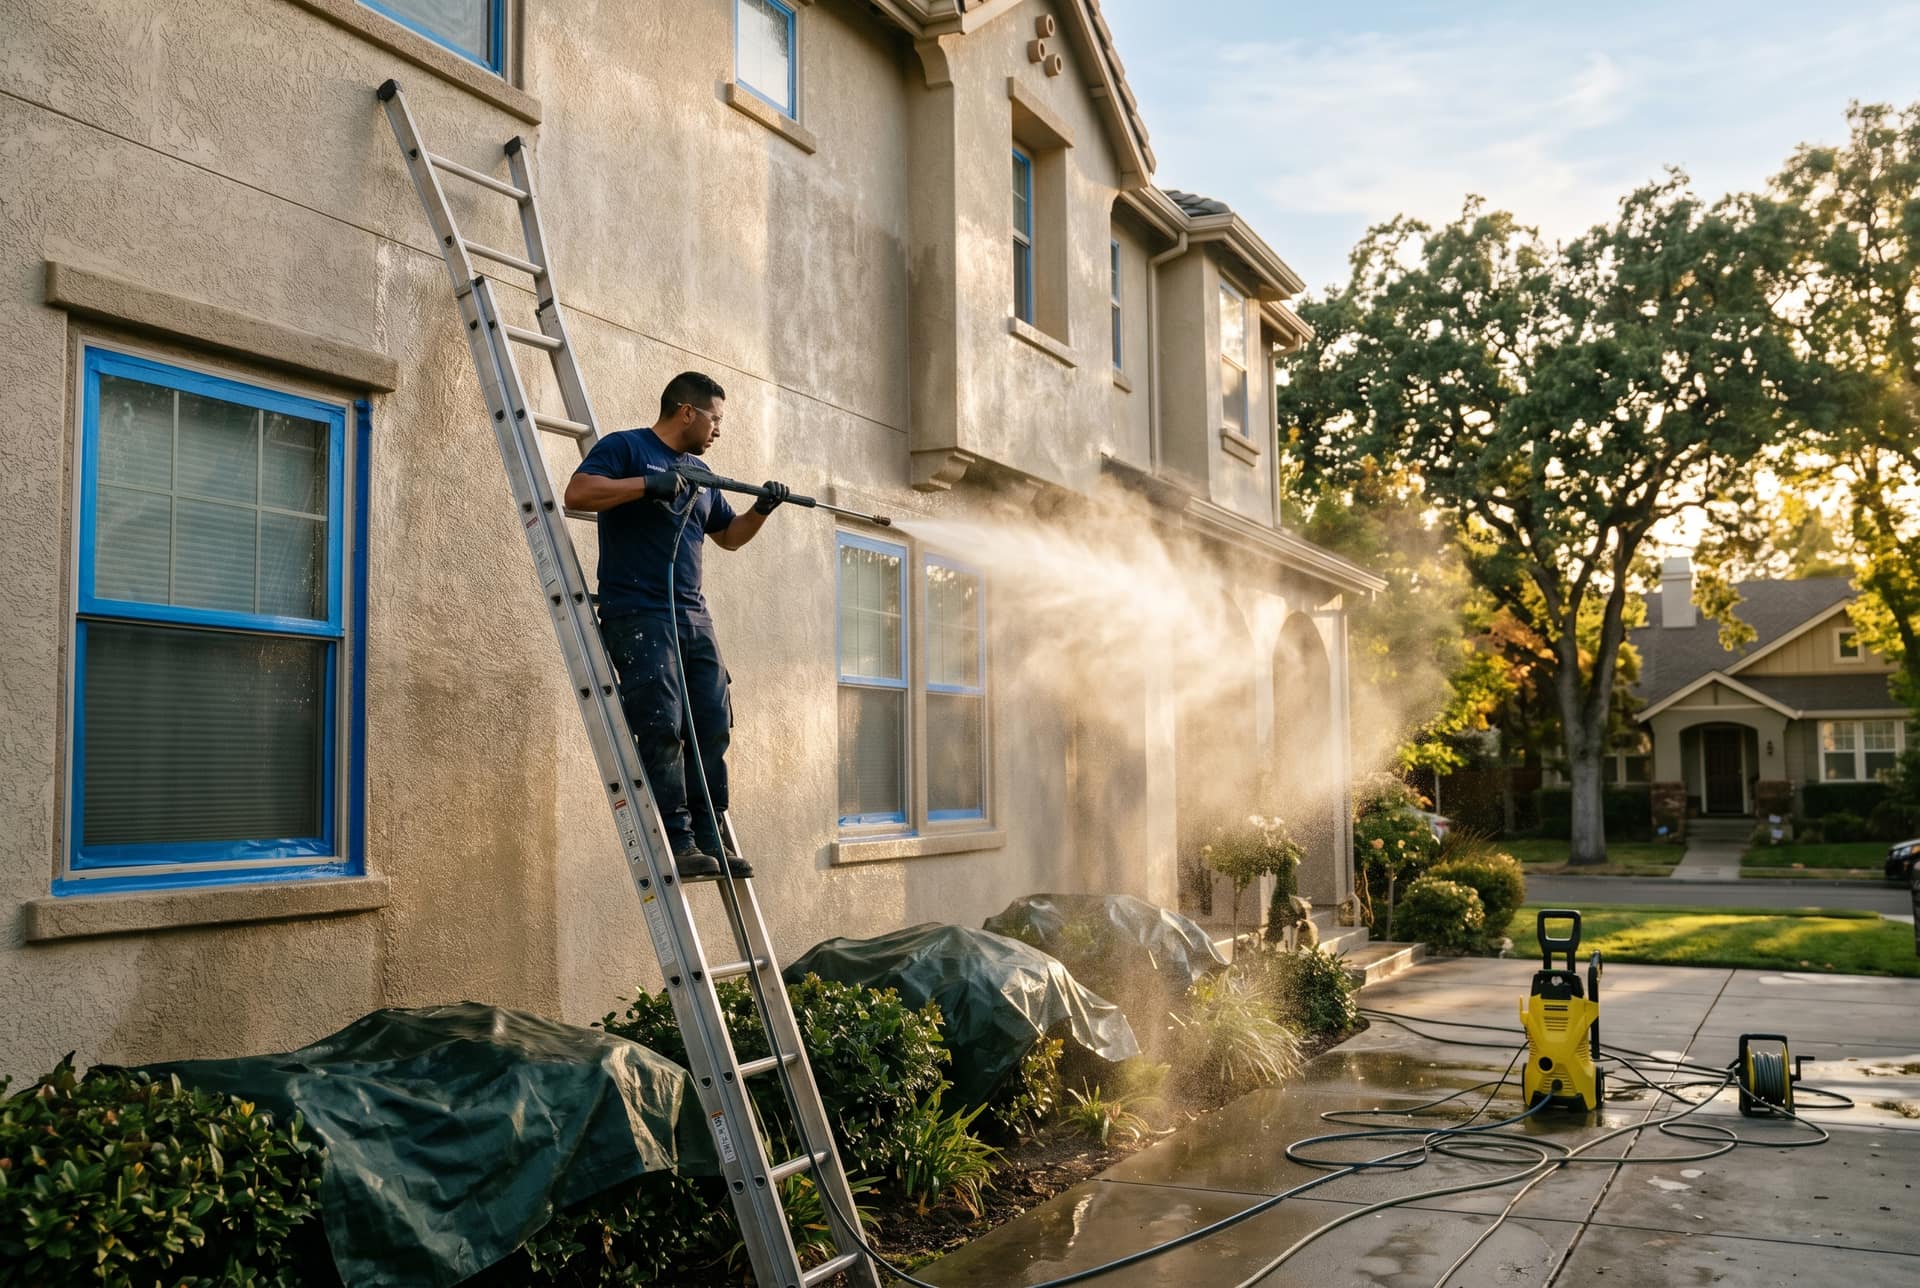
2. Pressure Washing
Proper cleaning removes dirt, mold, mildew, and chalky old paint:
Best practices:
- Use 2,000-3,000 PSI pressure washer
- Start from bottom to top, rinse top to bottom
- Hold nozzle 6-12 inches from surface
- Use appropriate cleaning solution for your siding type
- Allow 48-72 hours of dry time before painting
Sacramento-specific tips:
- Best time: Late spring or early summer
- Watch for dust accumulation from surrounding areas
- Address any water intrusion issues immediately
3. Surface Repairs
Fix all damage before painting:
Wood repairs:
- Replace rotted boards completely
- Fill small holes and cracks with exterior wood filler
- Use epoxy for larger repairs
- Sand repairs smooth once dry
Siding repairs:
- Re-nail loose siding
- Replace damaged pieces
- Ensure proper overlap and drainage
- Check for pest damage behind siding
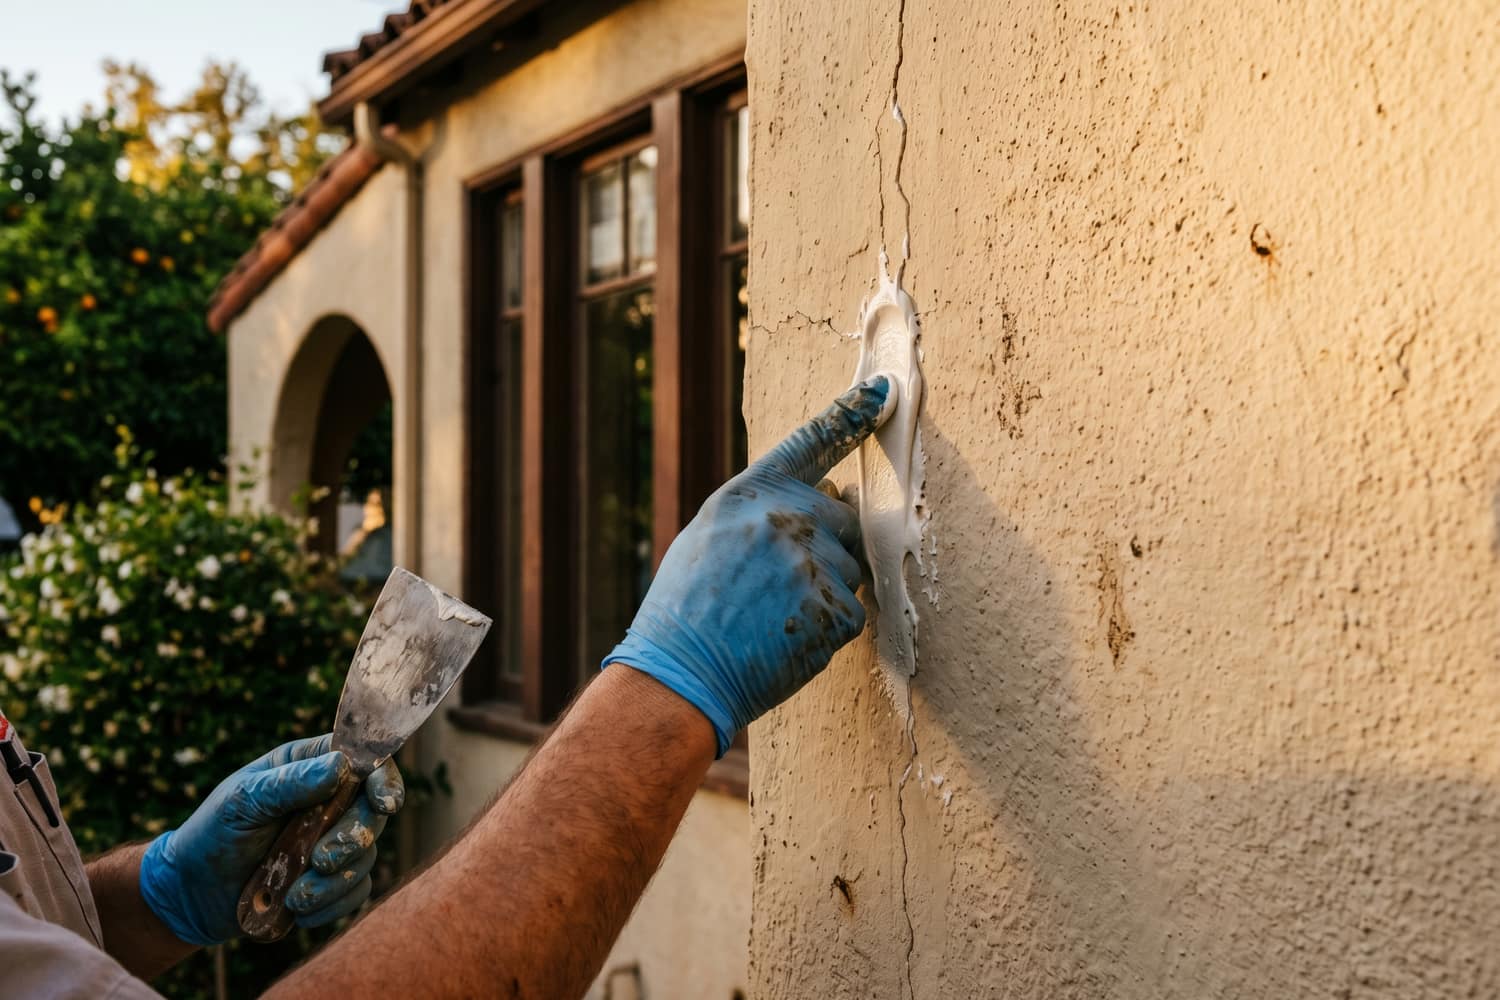
Caulking:
- Remove old, cracked caulk completely
- Apply paintable, exterior-grade caulk
- Focus on joints, seams, and around windows/doors
- Smooth bead with wet finger or tool
4. Scraping and Sanding
Remove loose, failing paint:
Manual scraping:
- Use a 4" putty knife for flat surfaces
- Detail scraper for tight areas
- Remove until you reach sound paint or bare wood
- Don't dig into the wood surface
Power sanding:
- Orbital sander for flat surfaces
- Detail sander for trim and corners
- Start with 80-grit, finish with 120-grit
- Always wear dust protection
Lead paint considerations:
- Required for homes built before 1978
- EPA-certified renovators only
- Containment and proper disposal required
- Never dry sand or pressure wash lead paint
5. Priming
Primer is essential for certain surfaces:
When priming is required:
- All bare wood surfaces
- Stained or water-damaged areas
- Glossy surfaces being painted
- Color changes from dark to light
- Patched and repaired areas
- Different material types (wood to metal)
Primer types:
- Oil-based: Best for stain blocking and bare wood
- Latex-based: Good for most pre-painted surfaces
- Shellac-based: Superior stain blocking for severe damage
6. Masking and Protection
Protect areas not being painted:
Essential protection:
- Windows: Tape and plastic sheeting
- Doors: Cover hardware or remove
- Landscaping: Drop cloths or plastic
- Walkways: Canvas drop cloths
- Outdoor fixtures: Remove or cover
Weather Considerations for Sacramento
Ideal Painting Conditions:
Temperature:
- Between 50°F and 85°F
- Best: 60°F-80°F
- Avoid extreme heat (common June-September)
Humidity:
- 40-70% relative humidity
- Low humidity can cause too-fast drying
- High humidity can cause poor adhesion
Best seasons:
- Spring (April-May): Ideal temperatures, lower humidity
- Fall (September-October): Cool but comfortable
- Winter (November-February): Possible but riskier
Avoid:
- Direct hot sun exposure (paint dries too fast)
- Rain or moisture within 24-48 hours
- Morning dew or frost
- Strong winds (dust and overspray issues)
Sacramento-Specific Challenges
Intense Sun Exposure
- UV damage is accelerated in Sacramento
- Use high-quality 100% acrylic paints
- Consider lighter colors to reflect heat
- North and west-facing walls need extra attention
Dry Climate
- Wood can dry and crack faster
- Extra attention to caulking required
- Moisture barriers important despite dry climate
- Dust and dirt accumulate quickly
Seasonal Changes
- 40°F temperature swings not uncommon
- Expansion and contraction stress paint
- Elastic paints perform better
- Regular maintenance extends life
Time Required for Preparation
Typical preparation timeline for average home (1,500-2,500 sq ft):
- Pressure washing: 4-6 hours
- Drying time: 2-3 days
- Repairs and carpentry: 1-3 days
- Scraping and sanding: 2-4 days
- Caulking: 1-2 days
- Priming: 1 day
- Final prep and masking: 1 day
Total prep time: 8-14 days before painting begins
Sacramento & Placer County
Need a real quote on your project?
Free, no-obligation walkthrough. Itemized estimate within 24 hours. Most jobs scheduled within 2–3 weeks.
DIY vs. Professional Preparation
DIY Preparation Pros:
- Lower upfront cost
- Work on your own schedule
- Learn about your home's condition
DIY Preparation Cons:
- Time-intensive (40-80 hours for average home)
- Requires proper equipment and tools
- May miss important issues
- Lead paint risks if not certified
- Physical demands and safety concerns
Professional Preparation Benefits:
- EPA-certified for lead paint work
- Proper equipment and experience
- Identifies all issues before they become problems
- Warranty coverage
- Efficient timeline
- Better surface preparation quality
Essential Tools and Materials
Basic tools needed:
- Pressure washer (rent or hire)
- Scraper set (various sizes)
- Power sander and sandpaper (80, 120, 220 grit)
- Caulk gun and exterior caulk
- Putty knives
- Wire brushes
- Painter's tape and plastic sheeting
- Drop cloths
- Safety equipment (goggles, masks, gloves)
Materials needed:
- Exterior wood filler
- Exterior-grade caulk (paintable)
- Primer (appropriate type)
- Cleaning solution
- Replacement boards (as needed)
Common Preparation Mistakes to Avoid
1. Skipping Pressure Washing
Results in poor paint adhesion and premature failure.
2. Not Allowing Proper Dry Time
Painting over damp surfaces causes bubbling and peeling.
3. Inadequate Scraping
Loose paint under new paint leads to early failure.
4. Over-Sanding
Creates grooves and unevenness visible after painting.
5. Poor Caulking
Leaves gaps for water intrusion and energy loss.
6. Skipping Primer
Especially problematic on bare wood or stain coverage.
7. Working in Wrong Weather
Temperature and humidity extremes affect paint curing.
Preparation Checklist
Before painting begins, verify:
- All surfaces pressure washed and fully dry
- All repairs completed and sanded smooth
- Loose paint removed completely
- All gaps and joints caulked
- Primer applied to required areas and dry
- All non-painted areas masked and protected
- Weather forecast checked (48-hour clear window)
- Lead paint protocol followed if applicable
- Final inspection completed
- All tools and materials ready
How ProFlow Painting Handles Preparation
Our comprehensive preparation process includes:
- Complete inspection: Detailed assessment with photos
- Repair itemization: Written list of all repairs needed
- Professional pressure washing: With appropriate cleaners
- Expert carpentry: Licensed carpenters for wood repairs
- Thorough scraping: Hand and power tools as needed
- Complete sanding: Smooth finish preparation
- Premium caulking: Weatherproof seals everywhere needed
- Proper priming: Right primer for each surface
- Final quality check: Before any paint is applied
Get Professional Preparation
Don't risk an expensive paint job on poor preparation. Our team ensures every surface is properly prepared for lasting results.
Schedule your free exterior painting consultation:
- Call (916) 740-7249
- Get a detailed estimate online
- Ask about our preparation warranty
Serving Sacramento, Elk Grove, Folsom, Roseville, and surrounding areas with expert exterior painting preparation and professional painting services.
Free quote · Sacramento & Placer County
Ready for a real estimate, not a guess?
Tell us about your project and we'll walk it with you in person. Itemized quote within 24 hours, no high-pressure sales.